For the complete documentation index, see llms.txt. Markdown versions of all docs pages are available by appending .md to any docs URL.
Quickstart
Quickly set up an ambient mesh, enroll sample microservices, and experience automatic mTLS, with no app changes required.
Get started with ambient mesh. Ambient mesh is a sidecar-free service mesh architecture built into Istio. Rather than running a dedicated proxy alongside each workload, a shared proxy on each node handles zero-trust security for all workloads, and optional per-workload-class proxies provide additional features when needed. The result is a simpler deployment, lower resource usage, and reduced operational overhead, with the same security, traffic control, and observability benefits as a traditional service mesh.
In this guide, you set up an ambient mesh, deploy sample microservices, and verify that communication between workloads is automatically secured with mutual TLS (mTLS). No changes are needed in your apps.
Tip
Want to dive deeper? Try out the Quickstart lab for an interactive, browser-based experience, or read about the benefits of ambient mesh.
Before you begin
-
Create or use an existing Kubernetes or OpenShift cluster. For quick testing, you can deploy a local kind cluster.
kind create cluster --name ambientmesh -
Install
kubectl, the Kubernetes command line tool. Download thekubectlversion that is within one minor version of the Kubernetes cluster you plan to use.
Install an ambient mesh
Run the following getting started script, which installs the Gateway API resources and the latest version of Istio ambient mesh. For customizable installations with Helm instead, see the install guide.
curl -sSL https://get.ambientmesh.io | bash -The script waits for istiod, ztunnel, and istio-cni-node to finish rolling out, then prints the pod status. Because ztunnel and the CNI are deployed as daemon sets, the number of pods for each equals the number of nodes in your cluster.
Example output:
NAME                          READY   STATUS    RESTARTS   AGE
istio-cni-node-6s5nk          1/1     Running   0          2m53s
istiod-bb86b959f-msrg7        1/1     Running   0          2m45s
ztunnel-mx8nw                 1/1     Running   0          2m52s
Deploy a sample application
Deploy the Bookinfo sample application to explore the security, observability, traffic control, and resiliency features of your ambient mesh. Bookinfo is a sample online bookstore with four microservices: product page, book details, user reviews, and star ratings.
-
Deploy the Bookinfo microservices.
kubectl apply -f https://raw.githubusercontent.com/istio/istio/1.30.0/samples/bookinfo/platform/kube/bookinfo.yaml -
Verify that the Bookinfo pods are running.
kubectl get podsExample output:
NAME READY STATUS RESTARTS AGE details-v1-cf74bb974-nw94k 1/1 Running 0 42s productpage-v1-87d54dd59-wl7qf 1/1 Running 0 42s ratings-v1-7c4bbf97db-rwkw5 1/1 Running 0 42s reviews-v1-5fd6d4f8f8-66j45 1/1 Running 0 42s reviews-v2-6f9b55c5db-6ts96 1/1 Running 0 42s reviews-v3-7d99fd7978-dm6mx 1/1 Running 0 42s -
Create an ingress Gateway with the Kubernetes Gateway API, and an HTTPRoute to set up routes to each Bookinfo microservice.
kubectl apply -f https://raw.githubusercontent.com/istio/istio/1.30.0/samples/bookinfo/gateway-api/bookinfo-gateway.yaml- Using a cloud provider? Istio creates a
LoadBalancerservice to expose the Gateway. Your cloud provider automatically assigns a public IP address or hostname. - Testing locally, such as with
kind? Annotate the Gateway to change the service type toClusterIP.kubectl annotate gateway bookinfo-gateway networking.istio.io/service-type=ClusterIP --namespace=default
- Using a cloud provider? Istio creates a
-
Verify that the Gateway has an address and is programmed.
kubectl get gatewayExample output:
NAME CLASS ADDRESS PROGRAMMED AGE bookinfo-gateway istio bookinfo-gateway-istio.default.svc.cluster.local True 42s -
Access the Bookinfo services through the Gateway by port-forwarding its service.
kubectl port-forward svc/bookinfo-gateway-istio 8080:80 -
In your web browser, open the productpage route:
http://localhost:8080/productpage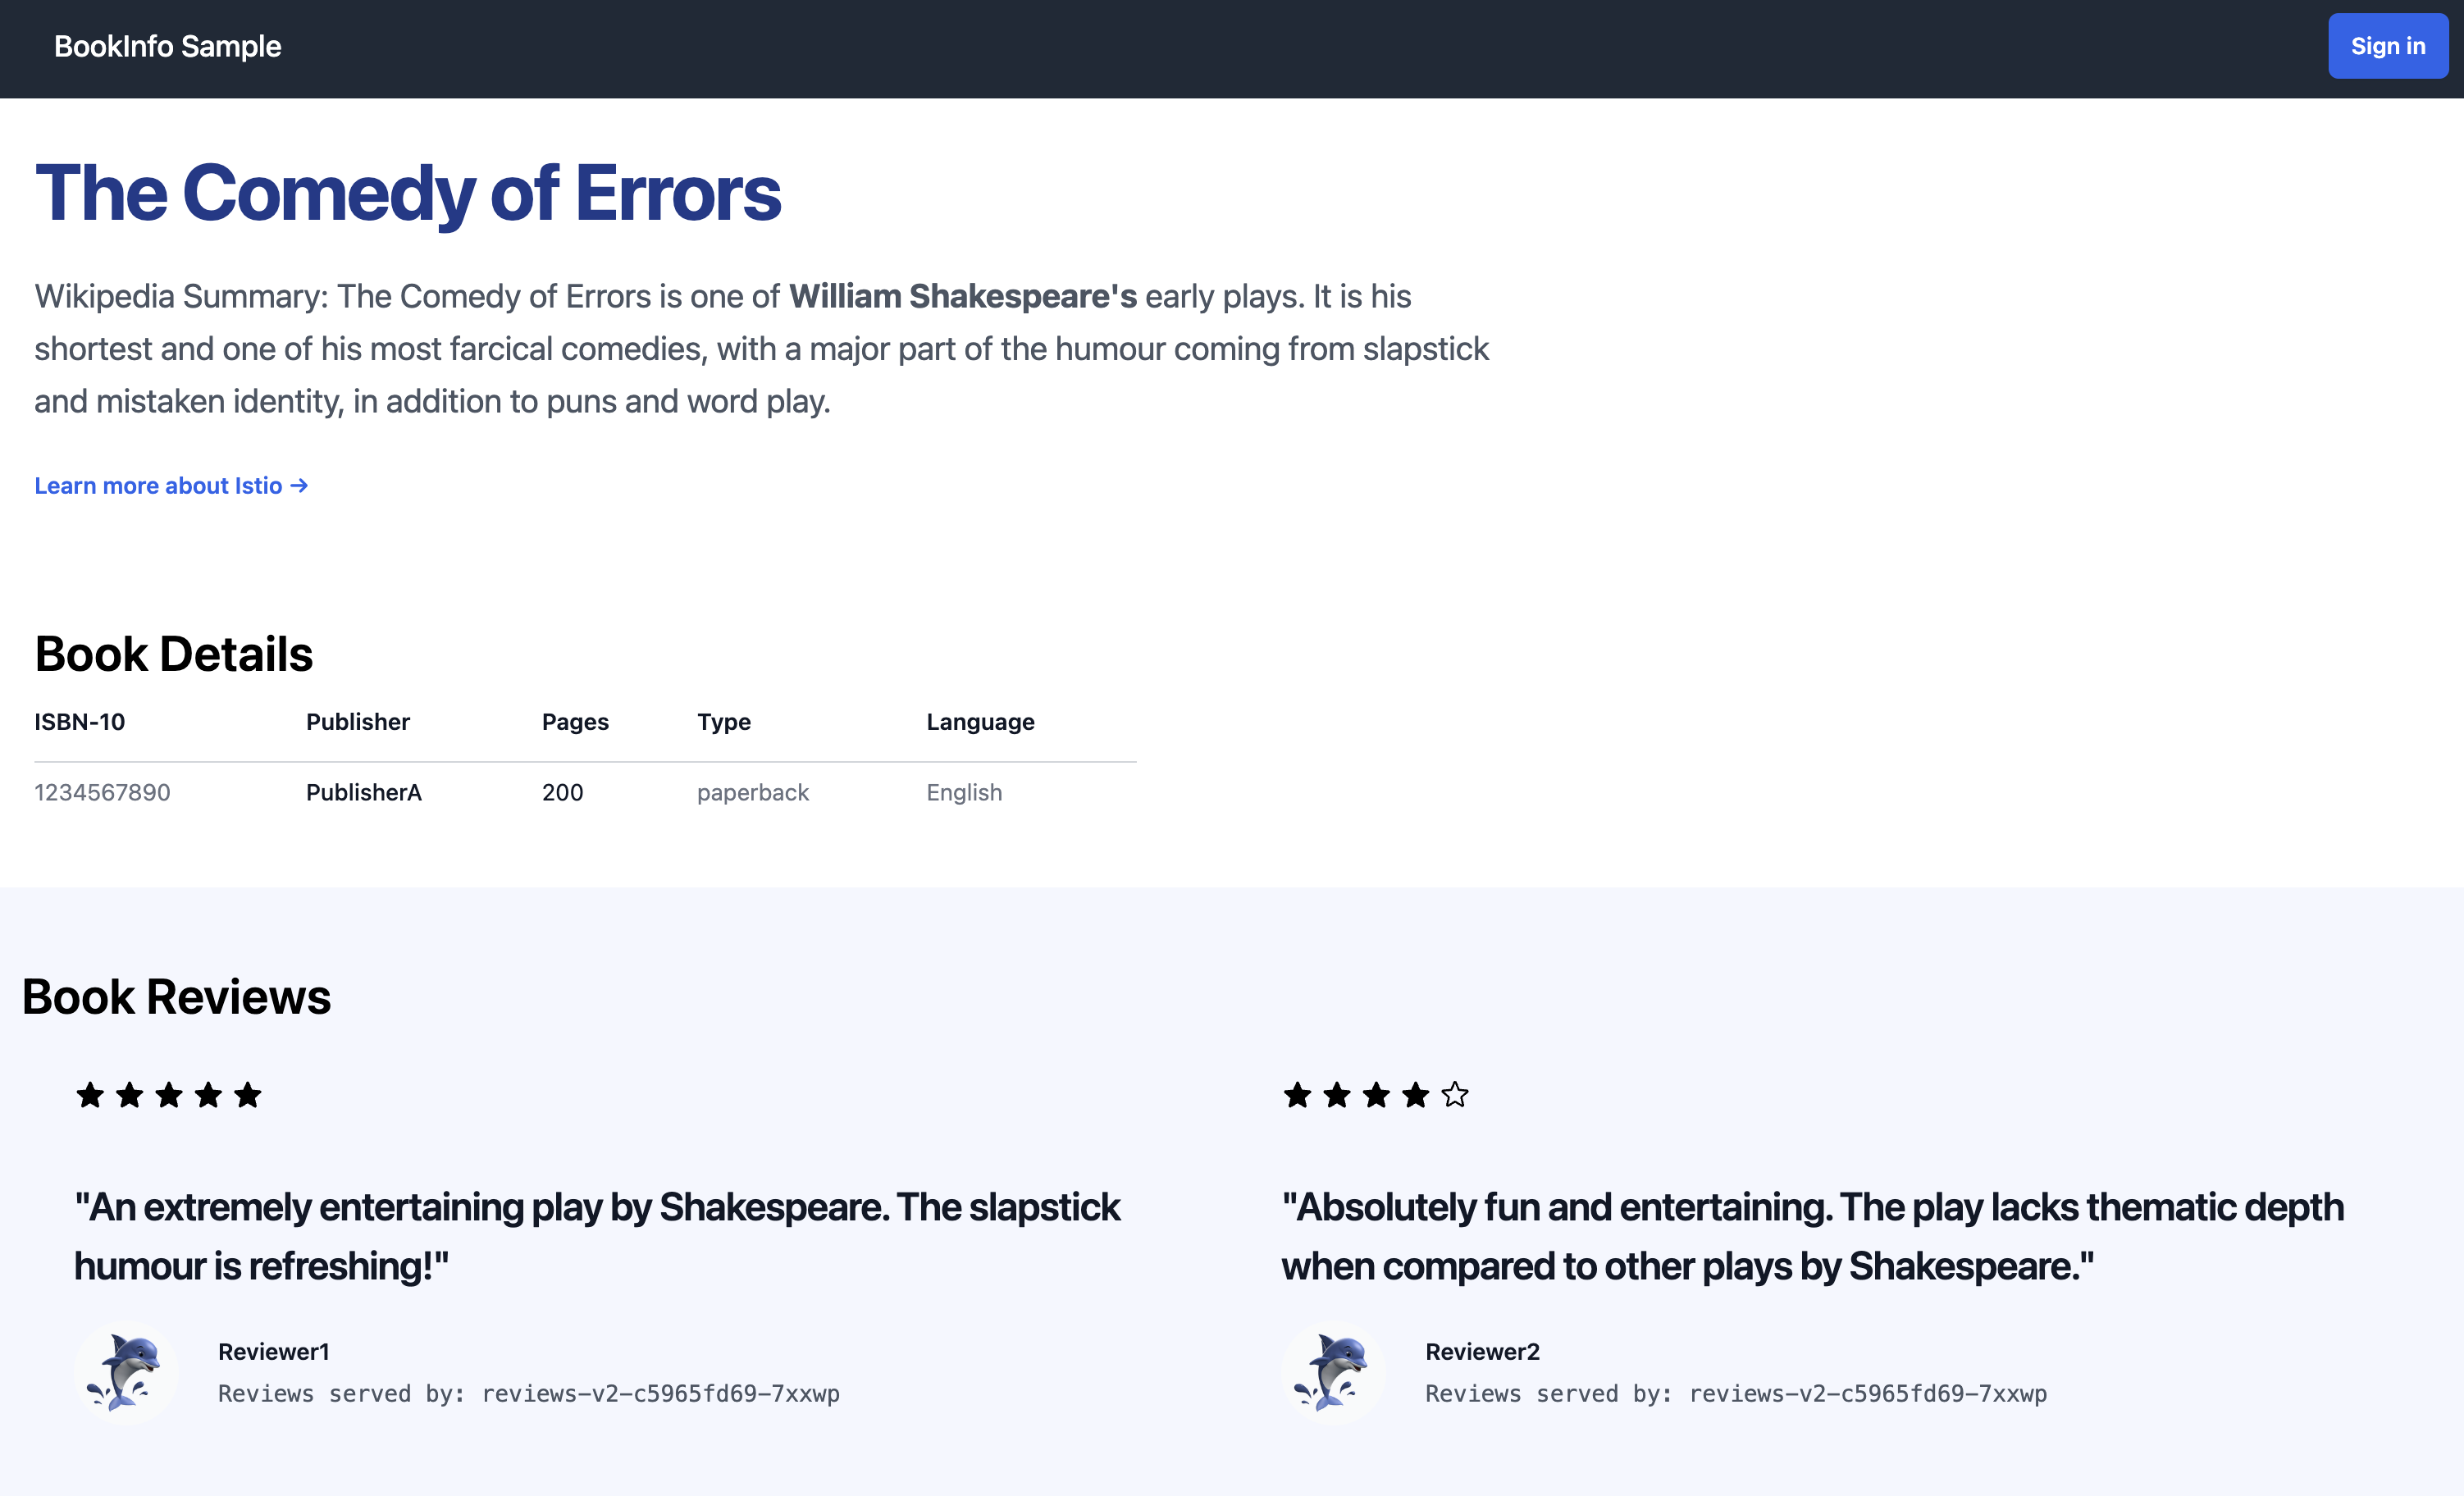
Figure: Bookinfo Application Figure: Bookinfo Application -
Refresh the page a few times. The book reviews and ratings change as the Gateway load balances requests across the different versions of the
reviewsservice.
Add Bookinfo to the mesh
Label the namespace where Bookinfo is deployed to add its pods to the ambient mesh. No restart or redeployment of your applications is needed.
kubectl label namespace default istio.io/dataplane-mode=ambientExample output:
namespace/default labeledAll pods in the default namespace are now part of the ambient mesh. Ambient mode automatically secures communication between them with mTLS and collects TCP telemetry data. When you open Bookinfo in your browser, the product page appears as before, but communication between pods is now encrypted.
Verify mTLS with observability tools
Use Kiali, an observability console for Istio, to verify that traffic in your mesh is encrypted with mTLS.
-
Install Kiali and Prometheus, which Kiali uses to collect and aggregate metrics.
kubectl apply -f https://get.ambientmesh.io/monitoring.yaml -
Access Kiali by port-forwarding its service.
kubectl port-forward svc/kiali 20001:20001 -n istio-system -
In your web browser, open the Kiali traffic graph page. Lock icons on graph edges indicate that traffic is encrypted with mTLS. If you do not see them, click Display and scroll down to Security badges.
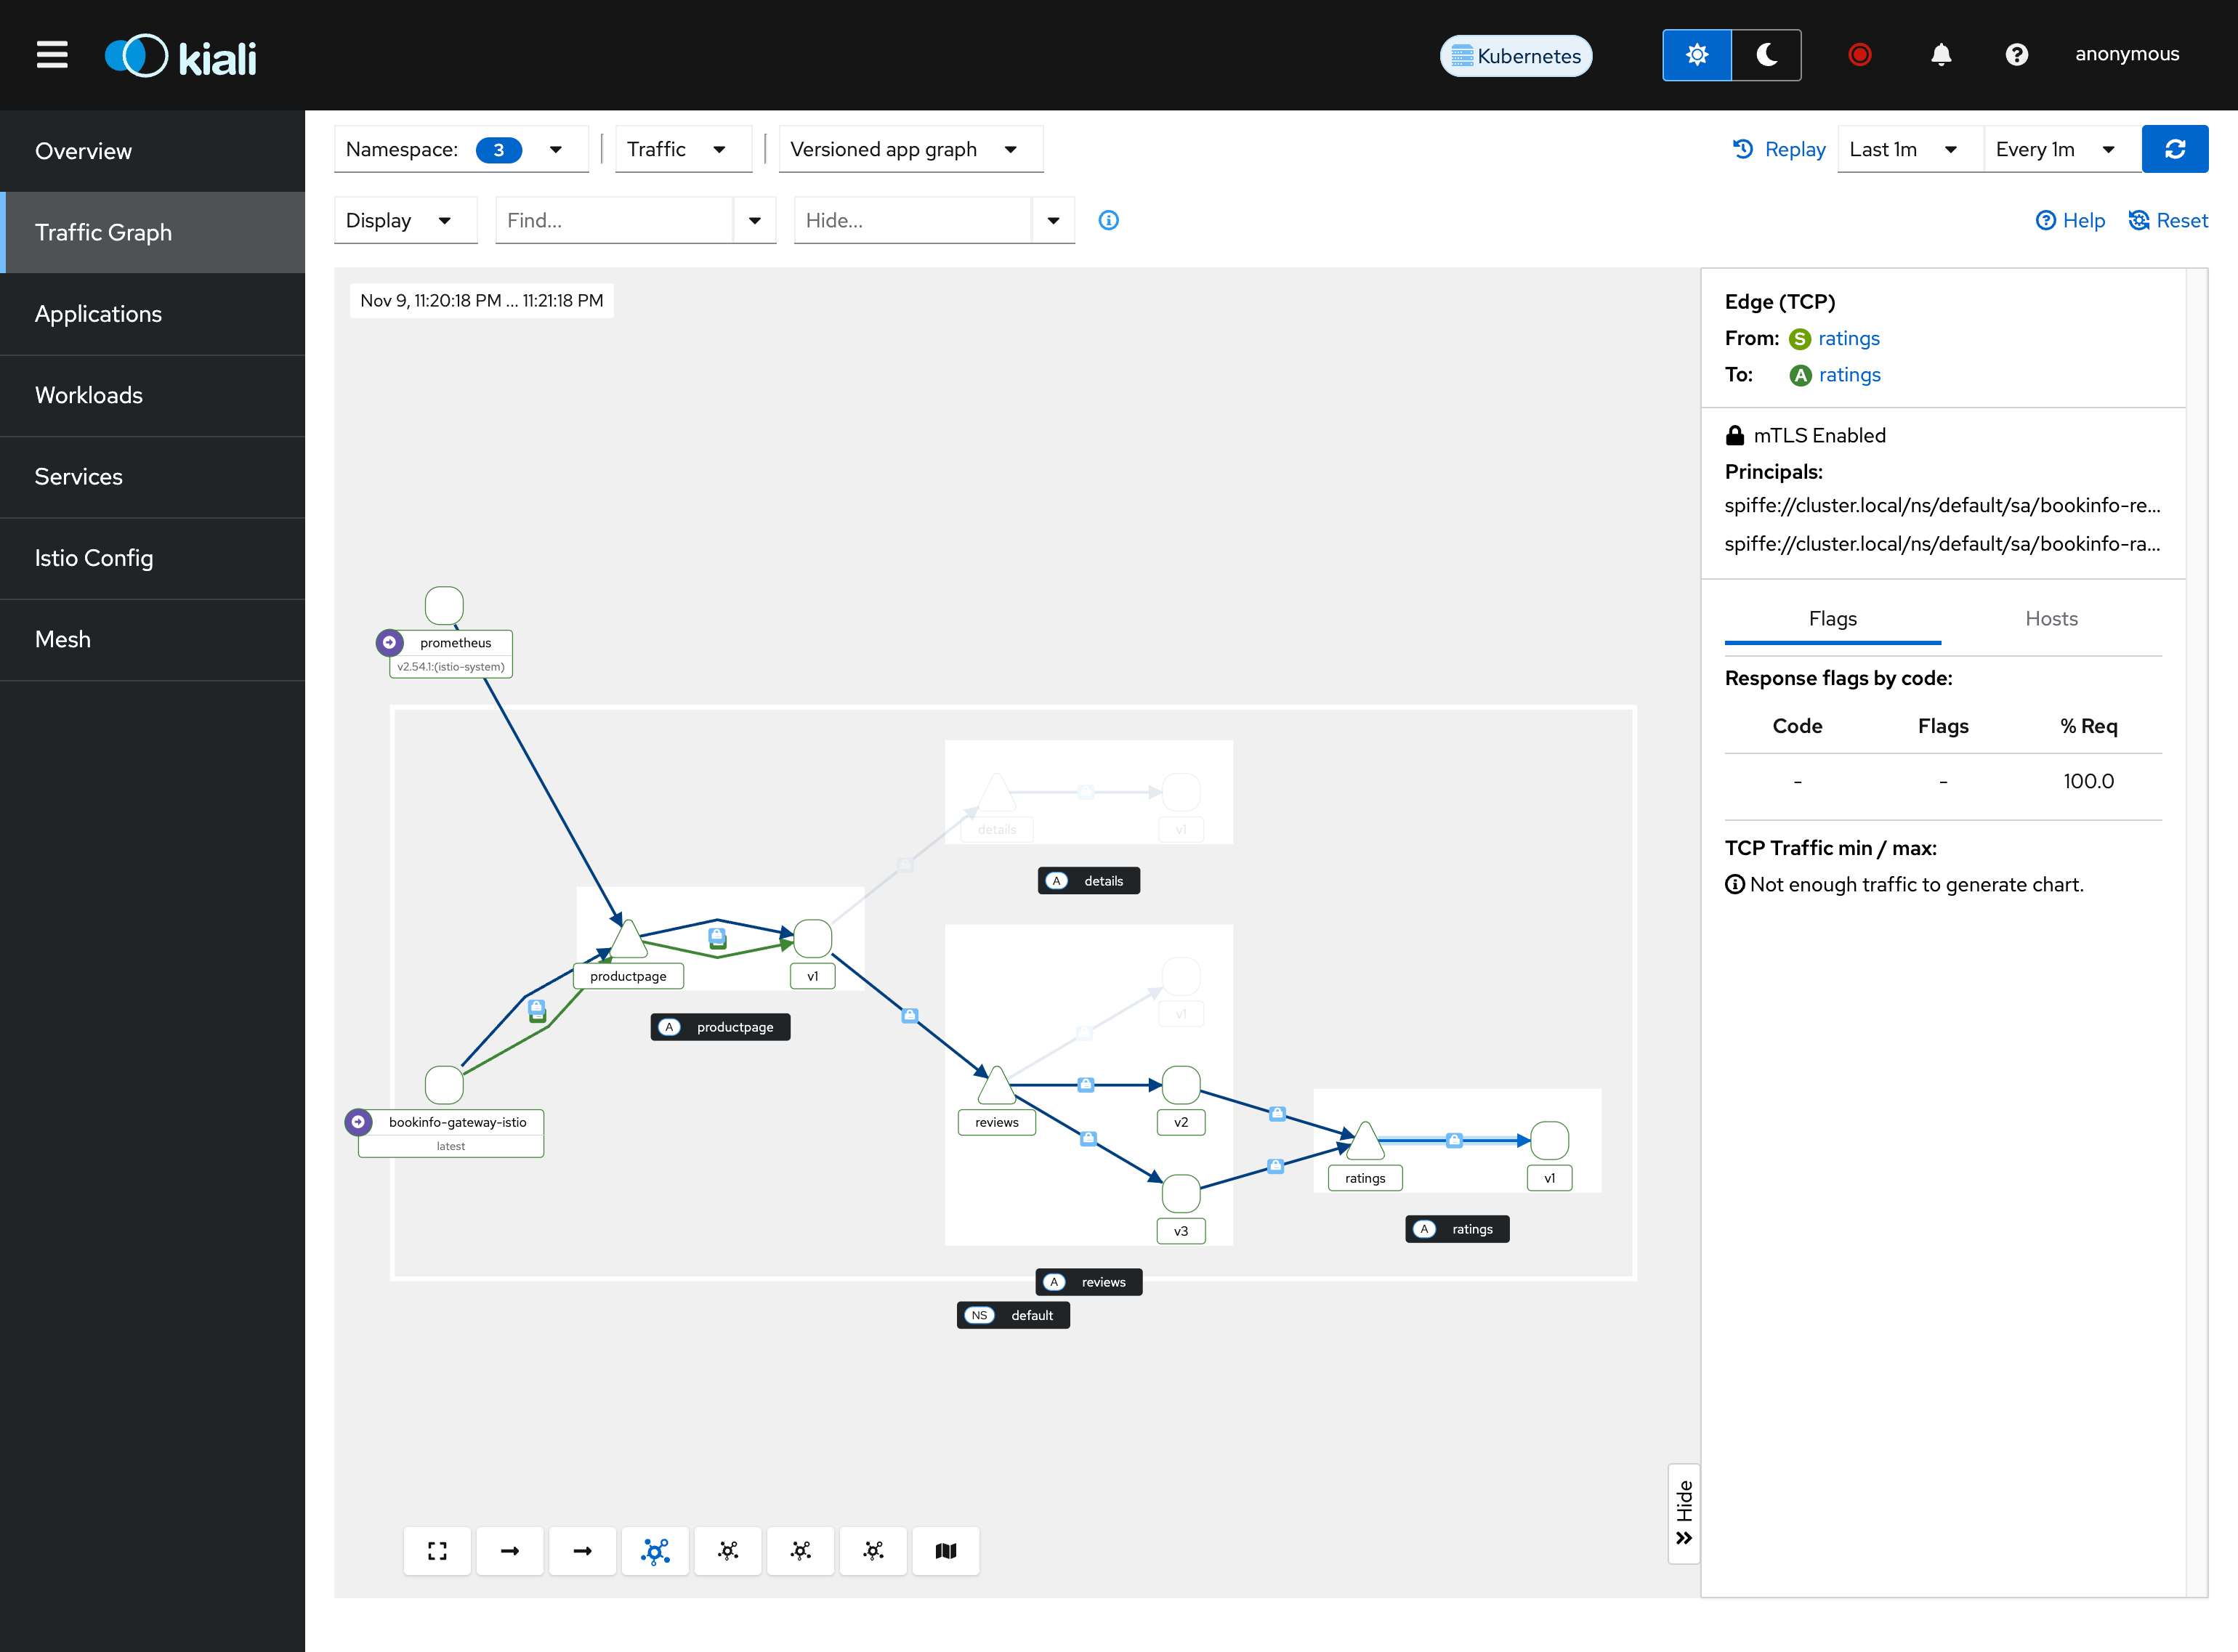
Figure: Kiali graph showing mTLS between the connections. Figure: Kiali graph showing mTLS between the connections. -
Click an edge between two services to see the identities in use. In this example, the identities relate to the service accounts for the ratings and reviews services in the default namespace.
Next steps
Now that you have an ambient mesh set up with automatic mTLS, explore what else you can do.